> ## Documentation Index
> Fetch the complete documentation index at: https://docs.blinkops.com/llms.txt
> Use this file to discover all available pages before exploring further.
# General Settings
> Configure general account settings including organization name, timezone, and preferences in Blink.
## General
In **General Settings** you can choose to:
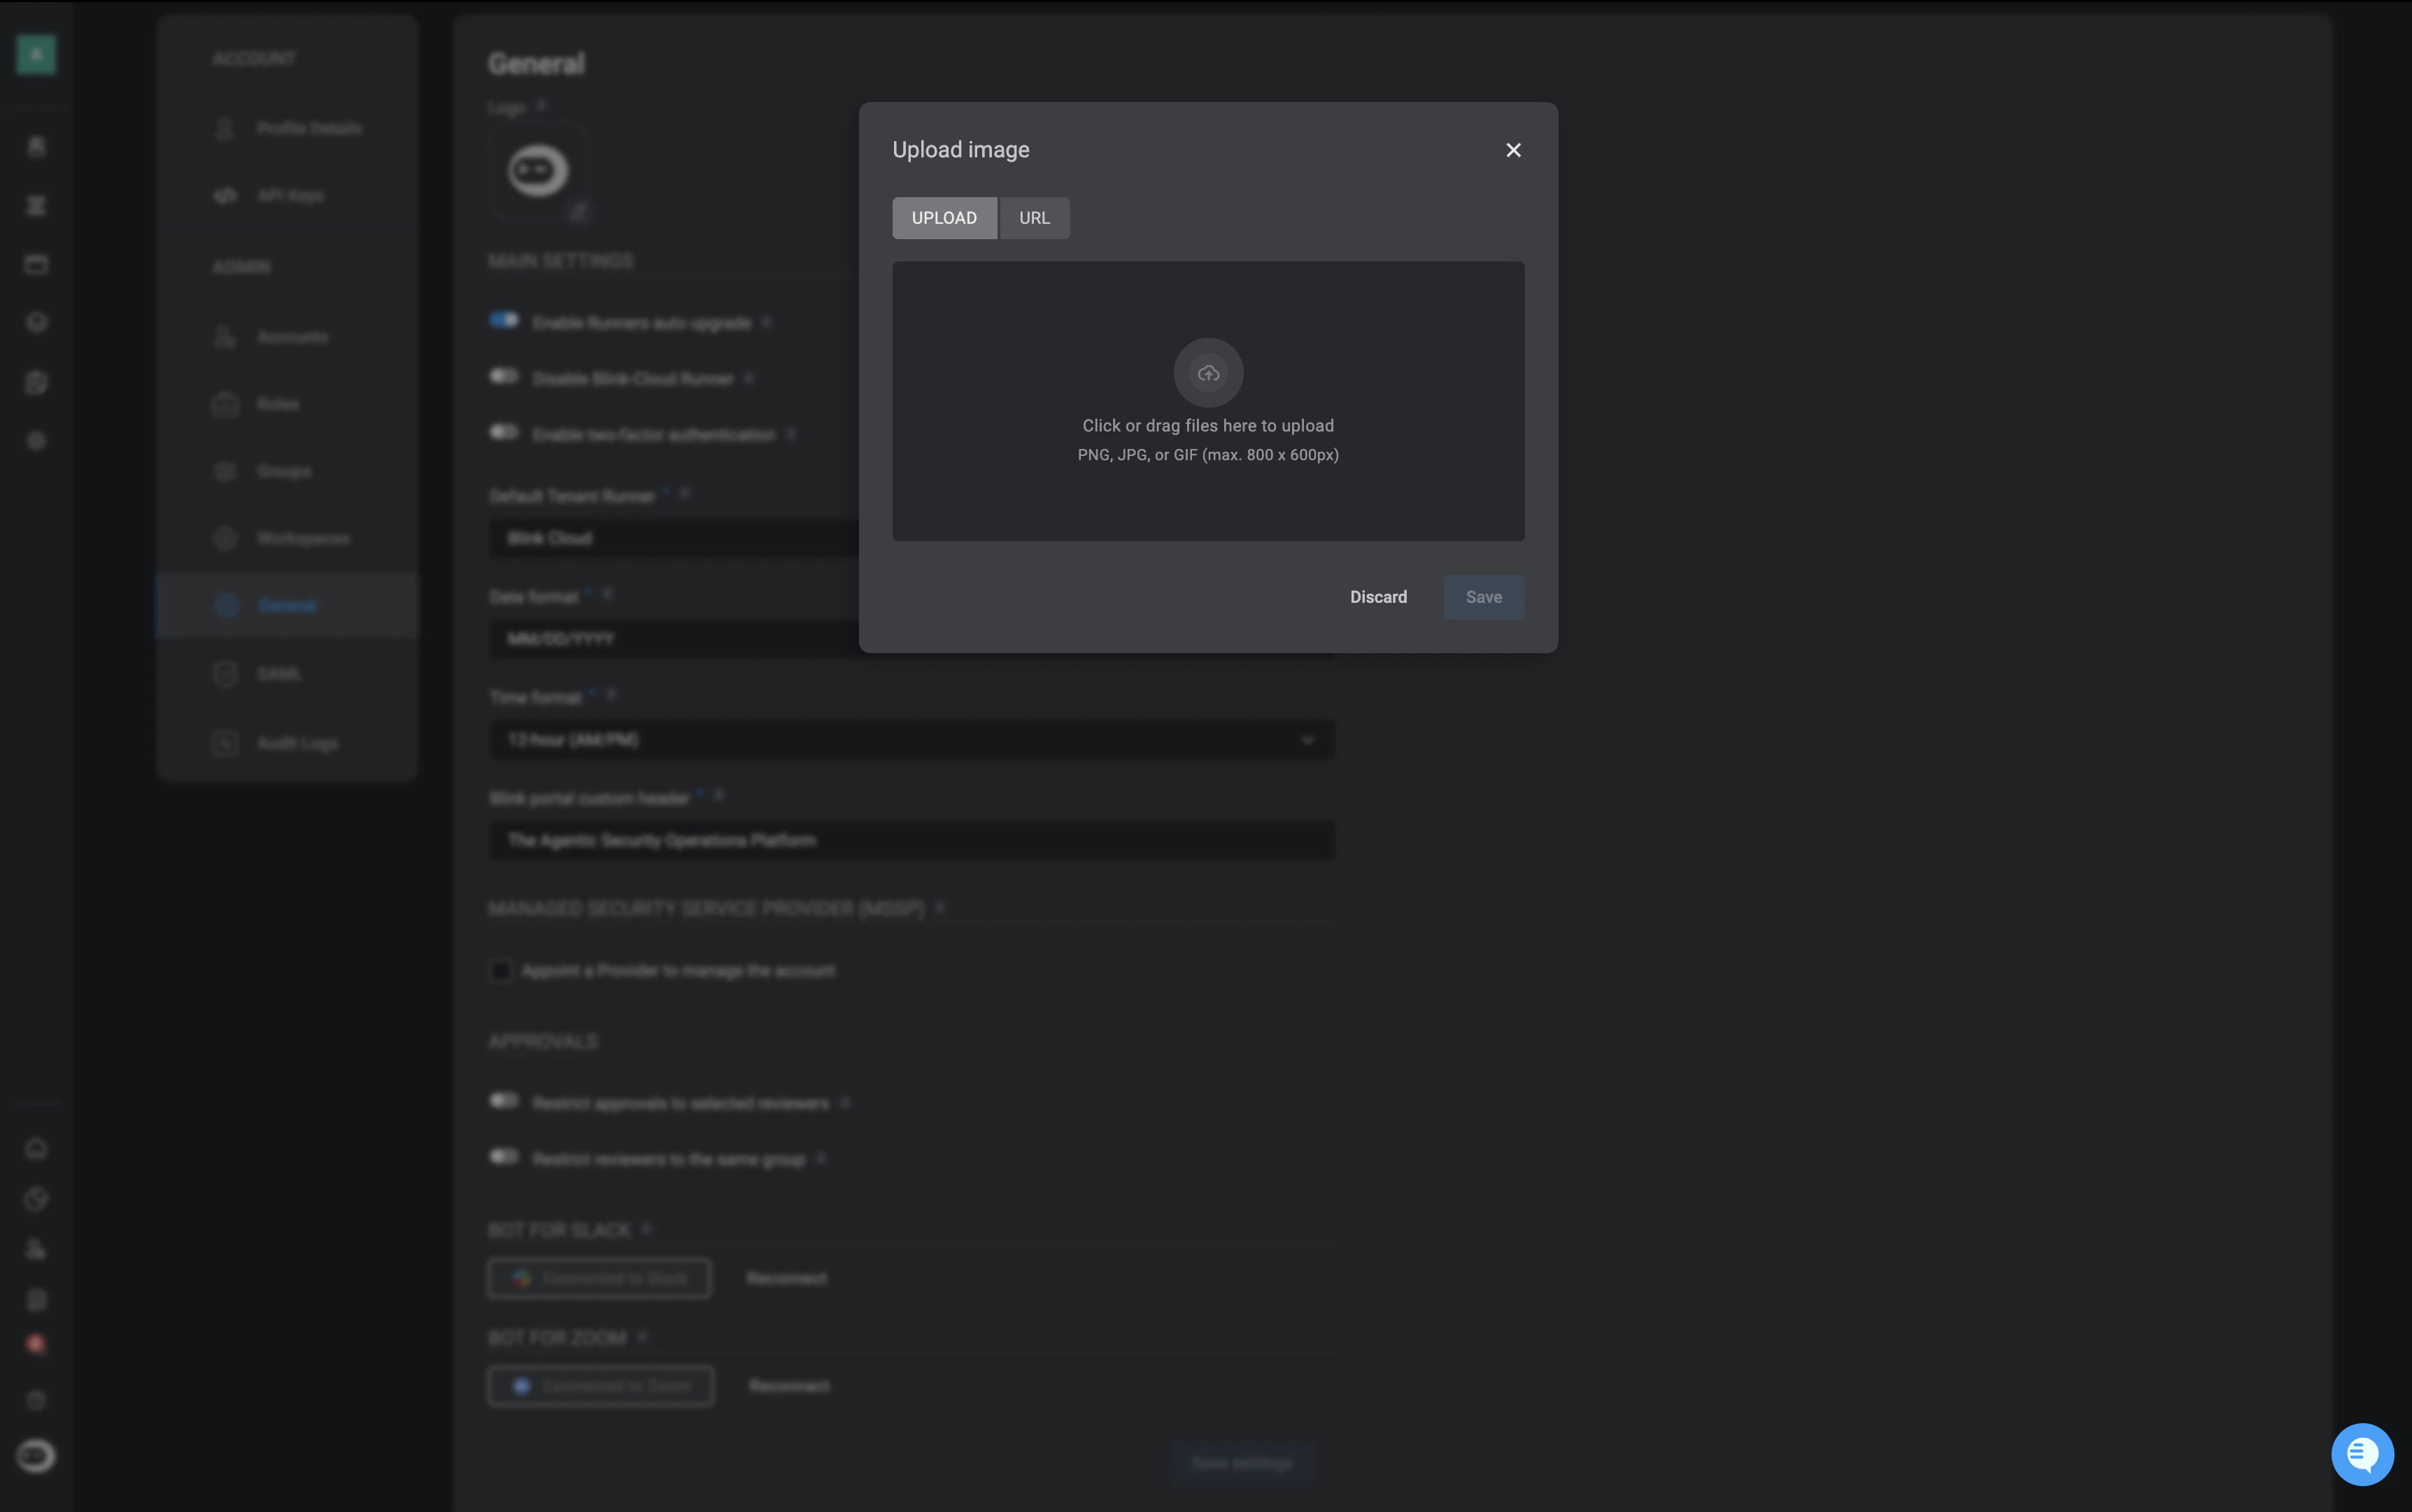
* Customize your account by adding your own logo. Simply select the image box, and upload your preferred logo either from **uploading a file** or by entering the **image URL** in the **URL tab**. Your logo will be displayed in the bottom-left corner of your screen.
 **Note**
The logo will be displayed in a squared ratio of 30px. We recommend uploading a picture with a size of at least 30x30 px.
The File format must be either a **JPG** or a **PNG**.
The File size can be up to **10 MB**.
***
## Main Settings
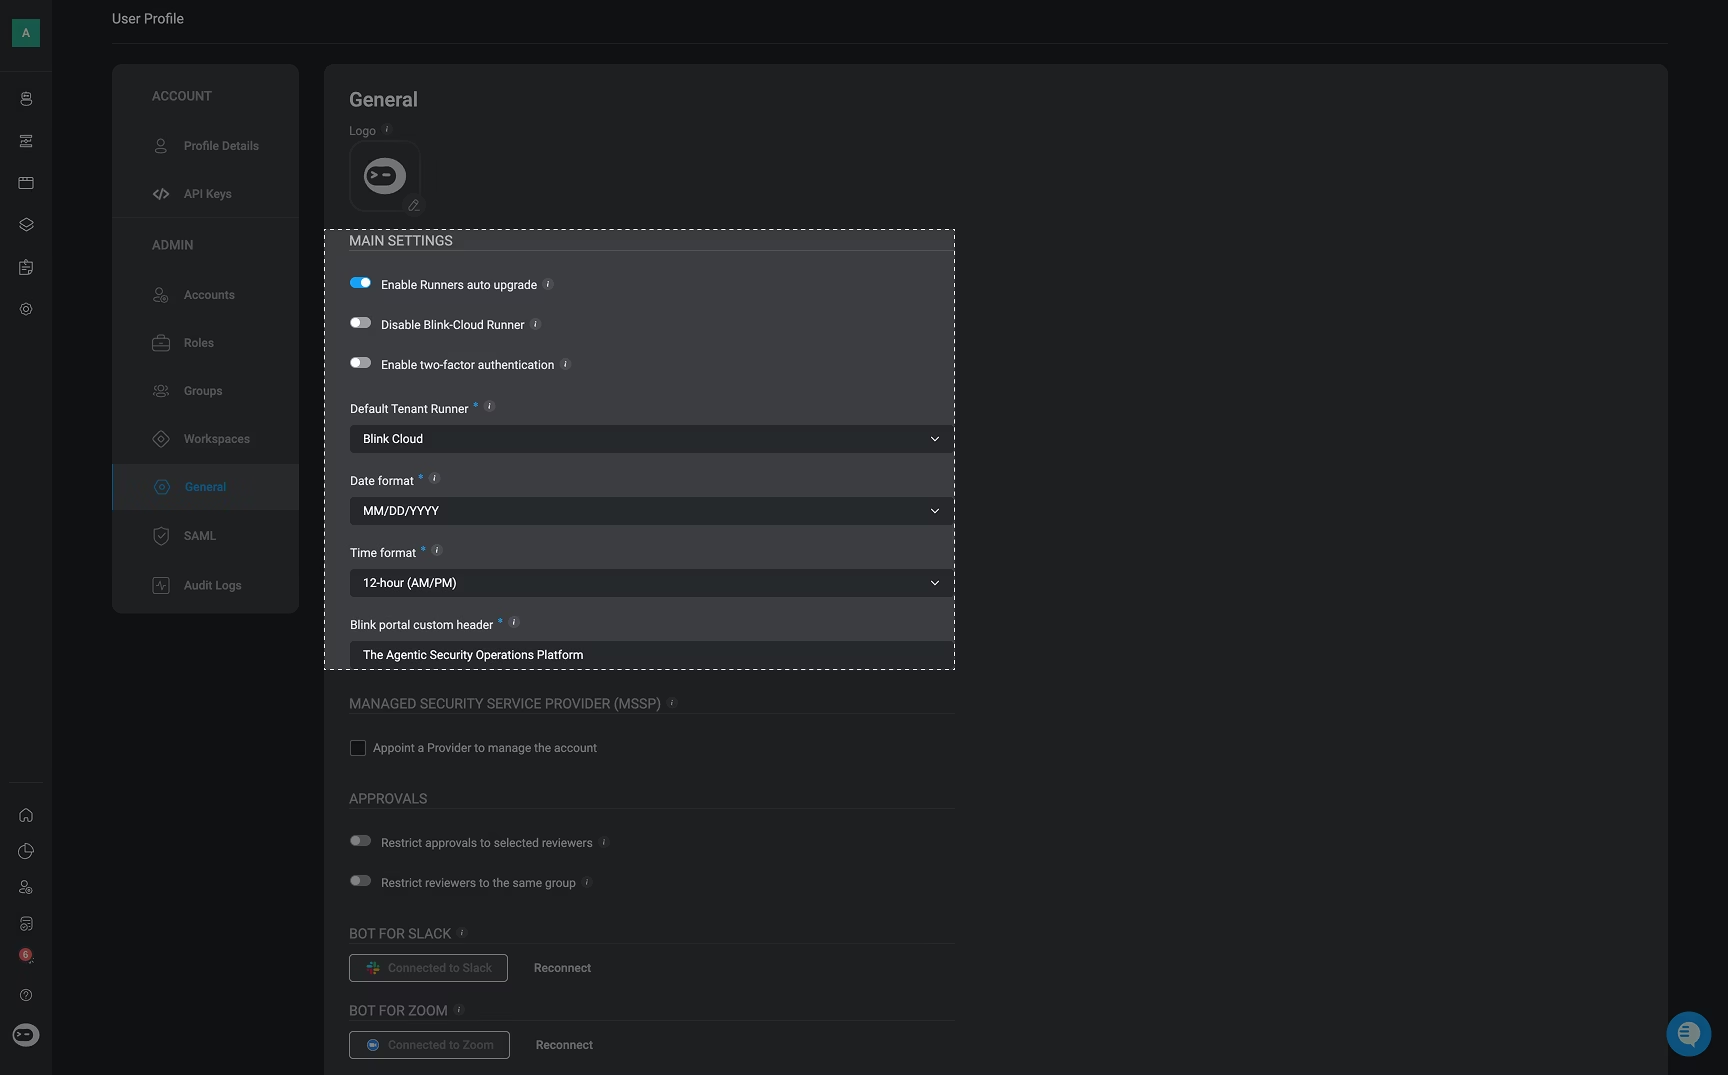
* Enable or Disable **runners to auto upgrade** by clicking the toggle button.
* Enable or Disable **Blink-Cloud runners** by clicking the toggle button.
* Enable or Disable [two factor authentication](/docs/blink-platform/account-management/authentication) by clicking the toggle button
Two-Factor Authentication (2FA) is enabled at the tenant level and is automatically enforced for all users in the tenant upon login.
* Select a **Default Tenant Runner** from the drop down menu.
* **Date Format** – Select the preferred date format to be applied across the entire Blink platform:
* **MM/DD/YYYY**
* **DD/MM/YYYY**
* **Time Format** – Select the preferred time display format for the Blink platform:
* **12-hour (AM/PM)**
* **24-hour**
* [Blink Portal Custom Header](/docs/blink-platform/blink-portal/blink-portal#customize-the-blink-portal-logo-and-header)- Set the header text that will be displayed in the [Blink Portal](/docs/blink-platform/blink-portal/blink-portal)
**Note**
The logo will be displayed in a squared ratio of 30px. We recommend uploading a picture with a size of at least 30x30 px.
The File format must be either a **JPG** or a **PNG**.
The File size can be up to **10 MB**.
***
## Main Settings
* Enable or Disable **runners to auto upgrade** by clicking the toggle button.
* Enable or Disable **Blink-Cloud runners** by clicking the toggle button.
* Enable or Disable [two factor authentication](/docs/blink-platform/account-management/authentication) by clicking the toggle button
Two-Factor Authentication (2FA) is enabled at the tenant level and is automatically enforced for all users in the tenant upon login.
* Select a **Default Tenant Runner** from the drop down menu.
* **Date Format** – Select the preferred date format to be applied across the entire Blink platform:
* **MM/DD/YYYY**
* **DD/MM/YYYY**
* **Time Format** – Select the preferred time display format for the Blink platform:
* **12-hour (AM/PM)**
* **24-hour**
* [Blink Portal Custom Header](/docs/blink-platform/blink-portal/blink-portal#customize-the-blink-portal-logo-and-header)- Set the header text that will be displayed in the [Blink Portal](/docs/blink-platform/blink-portal/blink-portal)
 ***
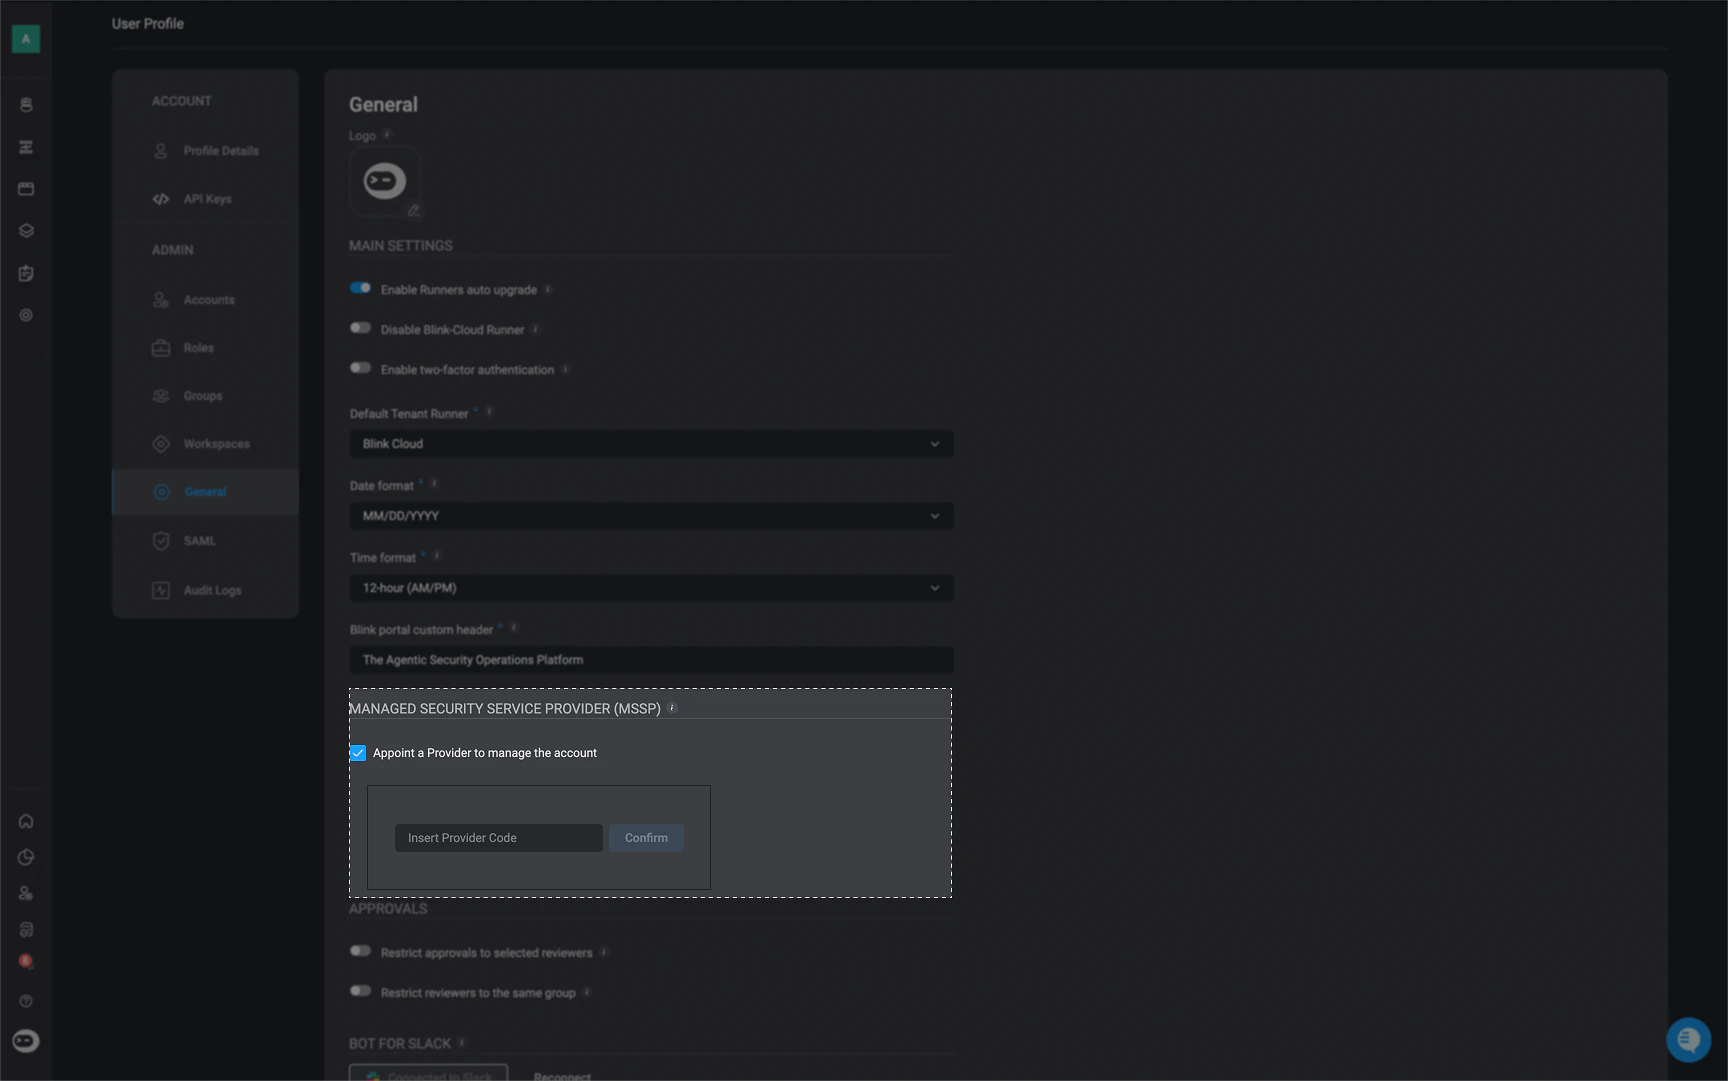
## Managed security service provider (MSSP)
* Appoint a provider to manage the account by entering the designated provider code. For more information visit the [Service Provider](/docs/blink-platform/service-providers/service-providers.mdx) section of our documentation.
***
## Managed security service provider (MSSP)
* Appoint a provider to manage the account by entering the designated provider code. For more information visit the [Service Provider](/docs/blink-platform/service-providers/service-providers.mdx) section of our documentation.
 ***
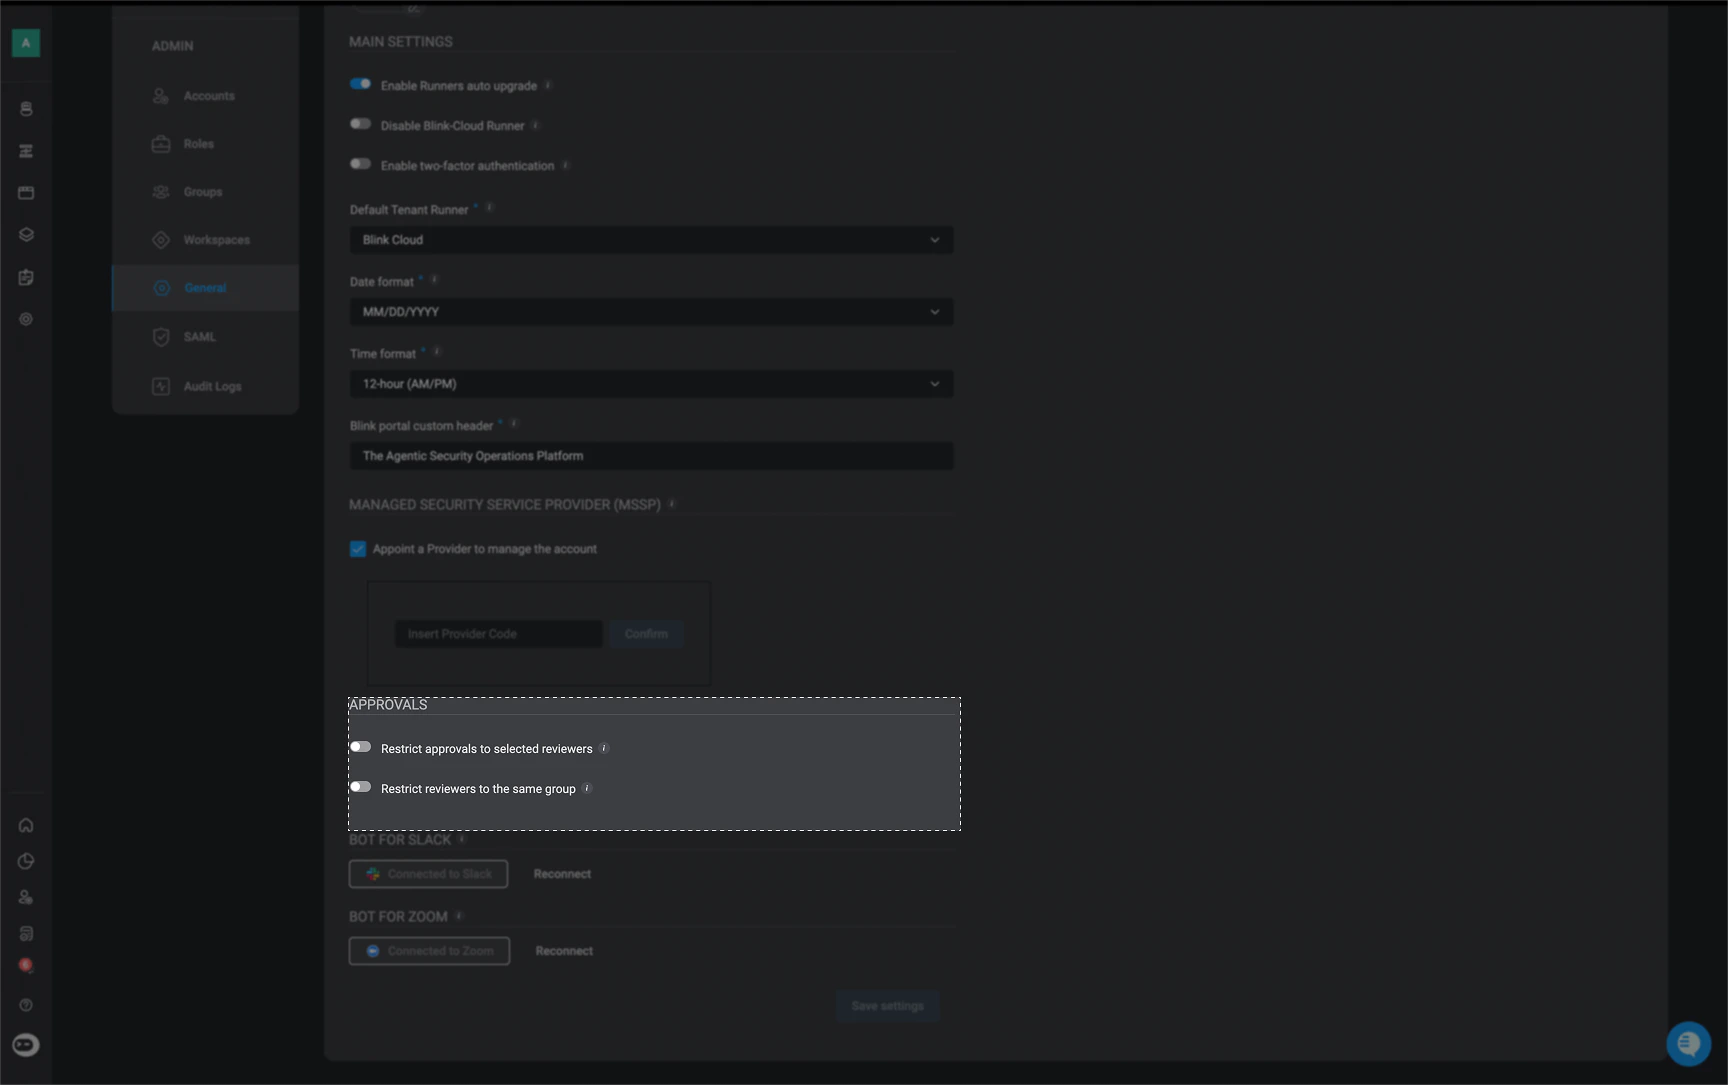
## Approvals
The [publish approval process](/docs/workflows/managing-workflows/publish-approval/publish-approval) ensures that workflow changes are reviewed before being published, creating a streamlined approval process. These settings enable administrators to maintain stricter control over publishing permissions.
* **Restrict approvals to selected reviewers:** when this setting is enabled, only the selected reviewers will be able to review and approve the workflow changes.
* **Restrict reviewers to the same group:** when this setting is enabled, the builder who submitted the changes for approval can only choose reviewers who belong to the same group as the builder.
***
## Approvals
The [publish approval process](/docs/workflows/managing-workflows/publish-approval/publish-approval) ensures that workflow changes are reviewed before being published, creating a streamlined approval process. These settings enable administrators to maintain stricter control over publishing permissions.
* **Restrict approvals to selected reviewers:** when this setting is enabled, only the selected reviewers will be able to review and approve the workflow changes.
* **Restrict reviewers to the same group:** when this setting is enabled, the builder who submitted the changes for approval can only choose reviewers who belong to the same group as the builder.
 ***
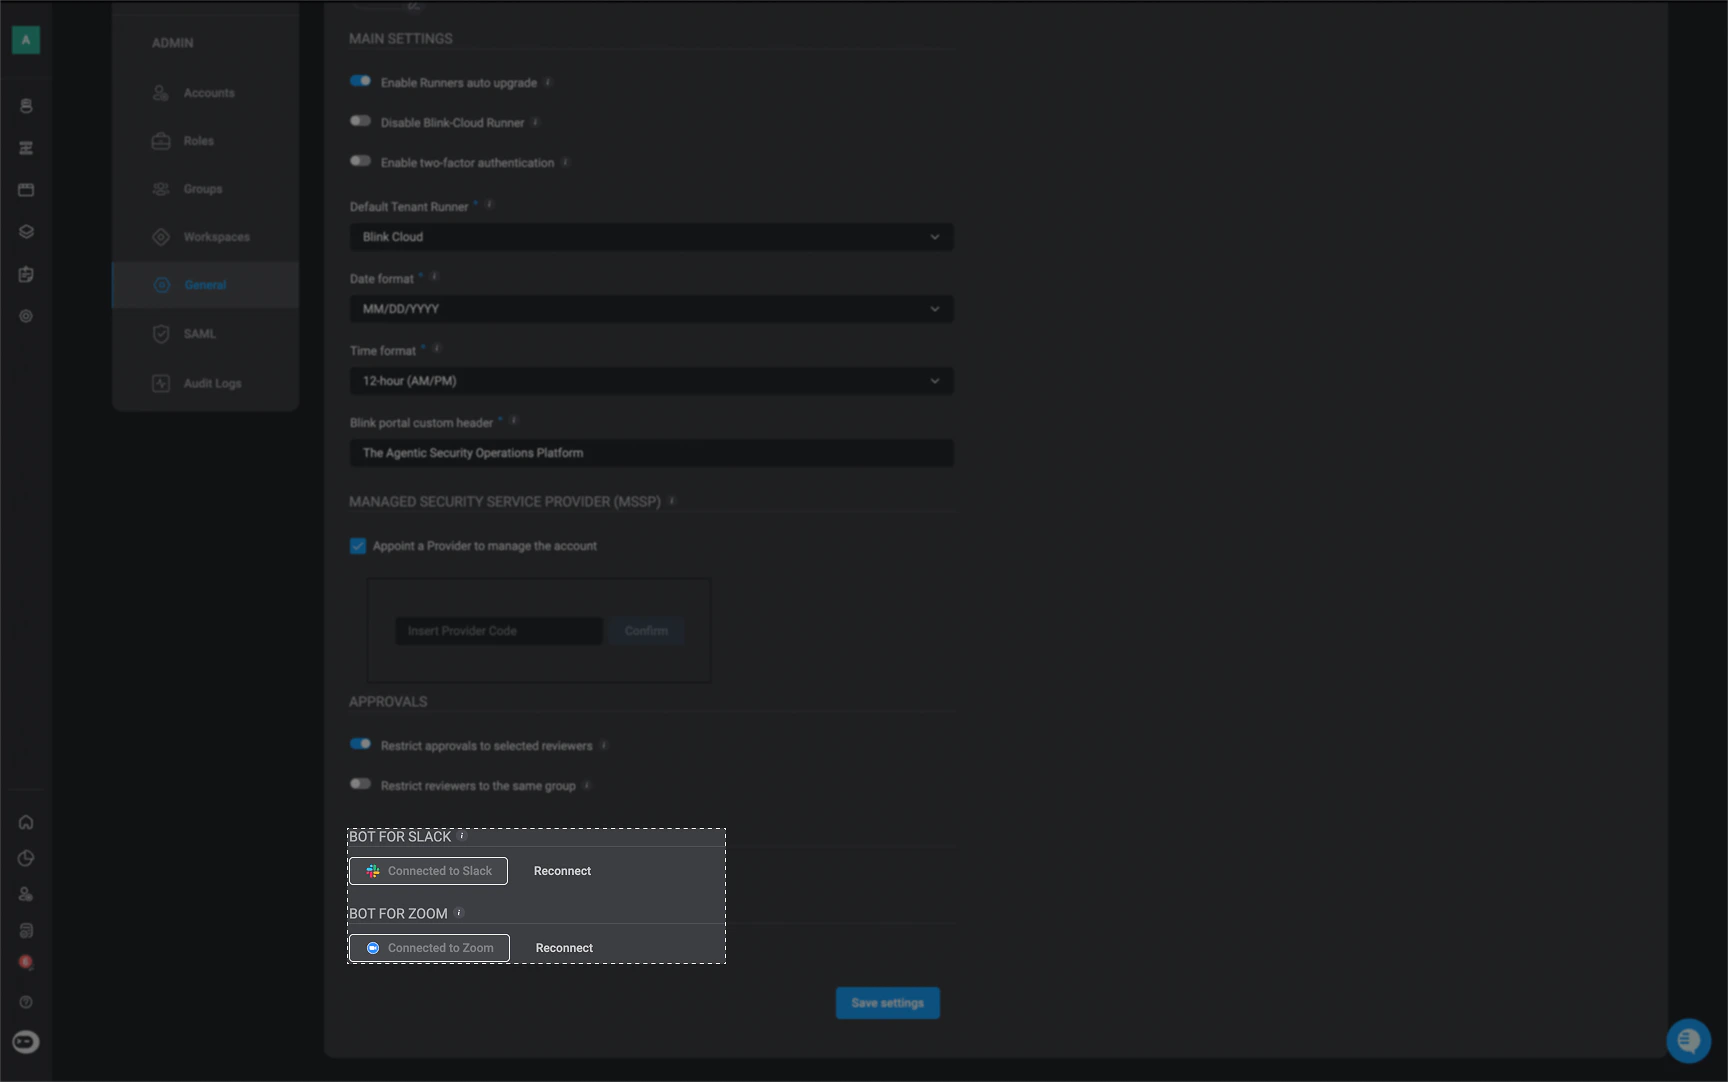
## Bots
* [Bot for Slack](/docs/blink-platform/blink-portal/blink-bot-for-slack): Create a Slack connection. See [creating a new connection](/docs/workflows/building-workflows/connections/creating-connection) for more details.
* [Bot For Zoom](/docs/blink-platform/blink-portal/zoom-slackbot): Create a Zoom connection. See [creating a new connection](/docs/workflows/building-workflows/connections/creating-connection) for more details.
***
## Bots
* [Bot for Slack](/docs/blink-platform/blink-portal/blink-bot-for-slack): Create a Slack connection. See [creating a new connection](/docs/workflows/building-workflows/connections/creating-connection) for more details.
* [Bot For Zoom](/docs/blink-platform/blink-portal/zoom-slackbot): Create a Zoom connection. See [creating a new connection](/docs/workflows/building-workflows/connections/creating-connection) for more details.