> ## Documentation Index
> Fetch the complete documentation index at: https://docs.blinkops.com/llms.txt
> Use this file to discover all available pages before exploring further.
# API Keys
> Create and manage API keys for programmatic access to the Blink platform.
In the API Keys settings page you can manage your personal API keys of the Blink platform. You can create, delete and edit your API keys.
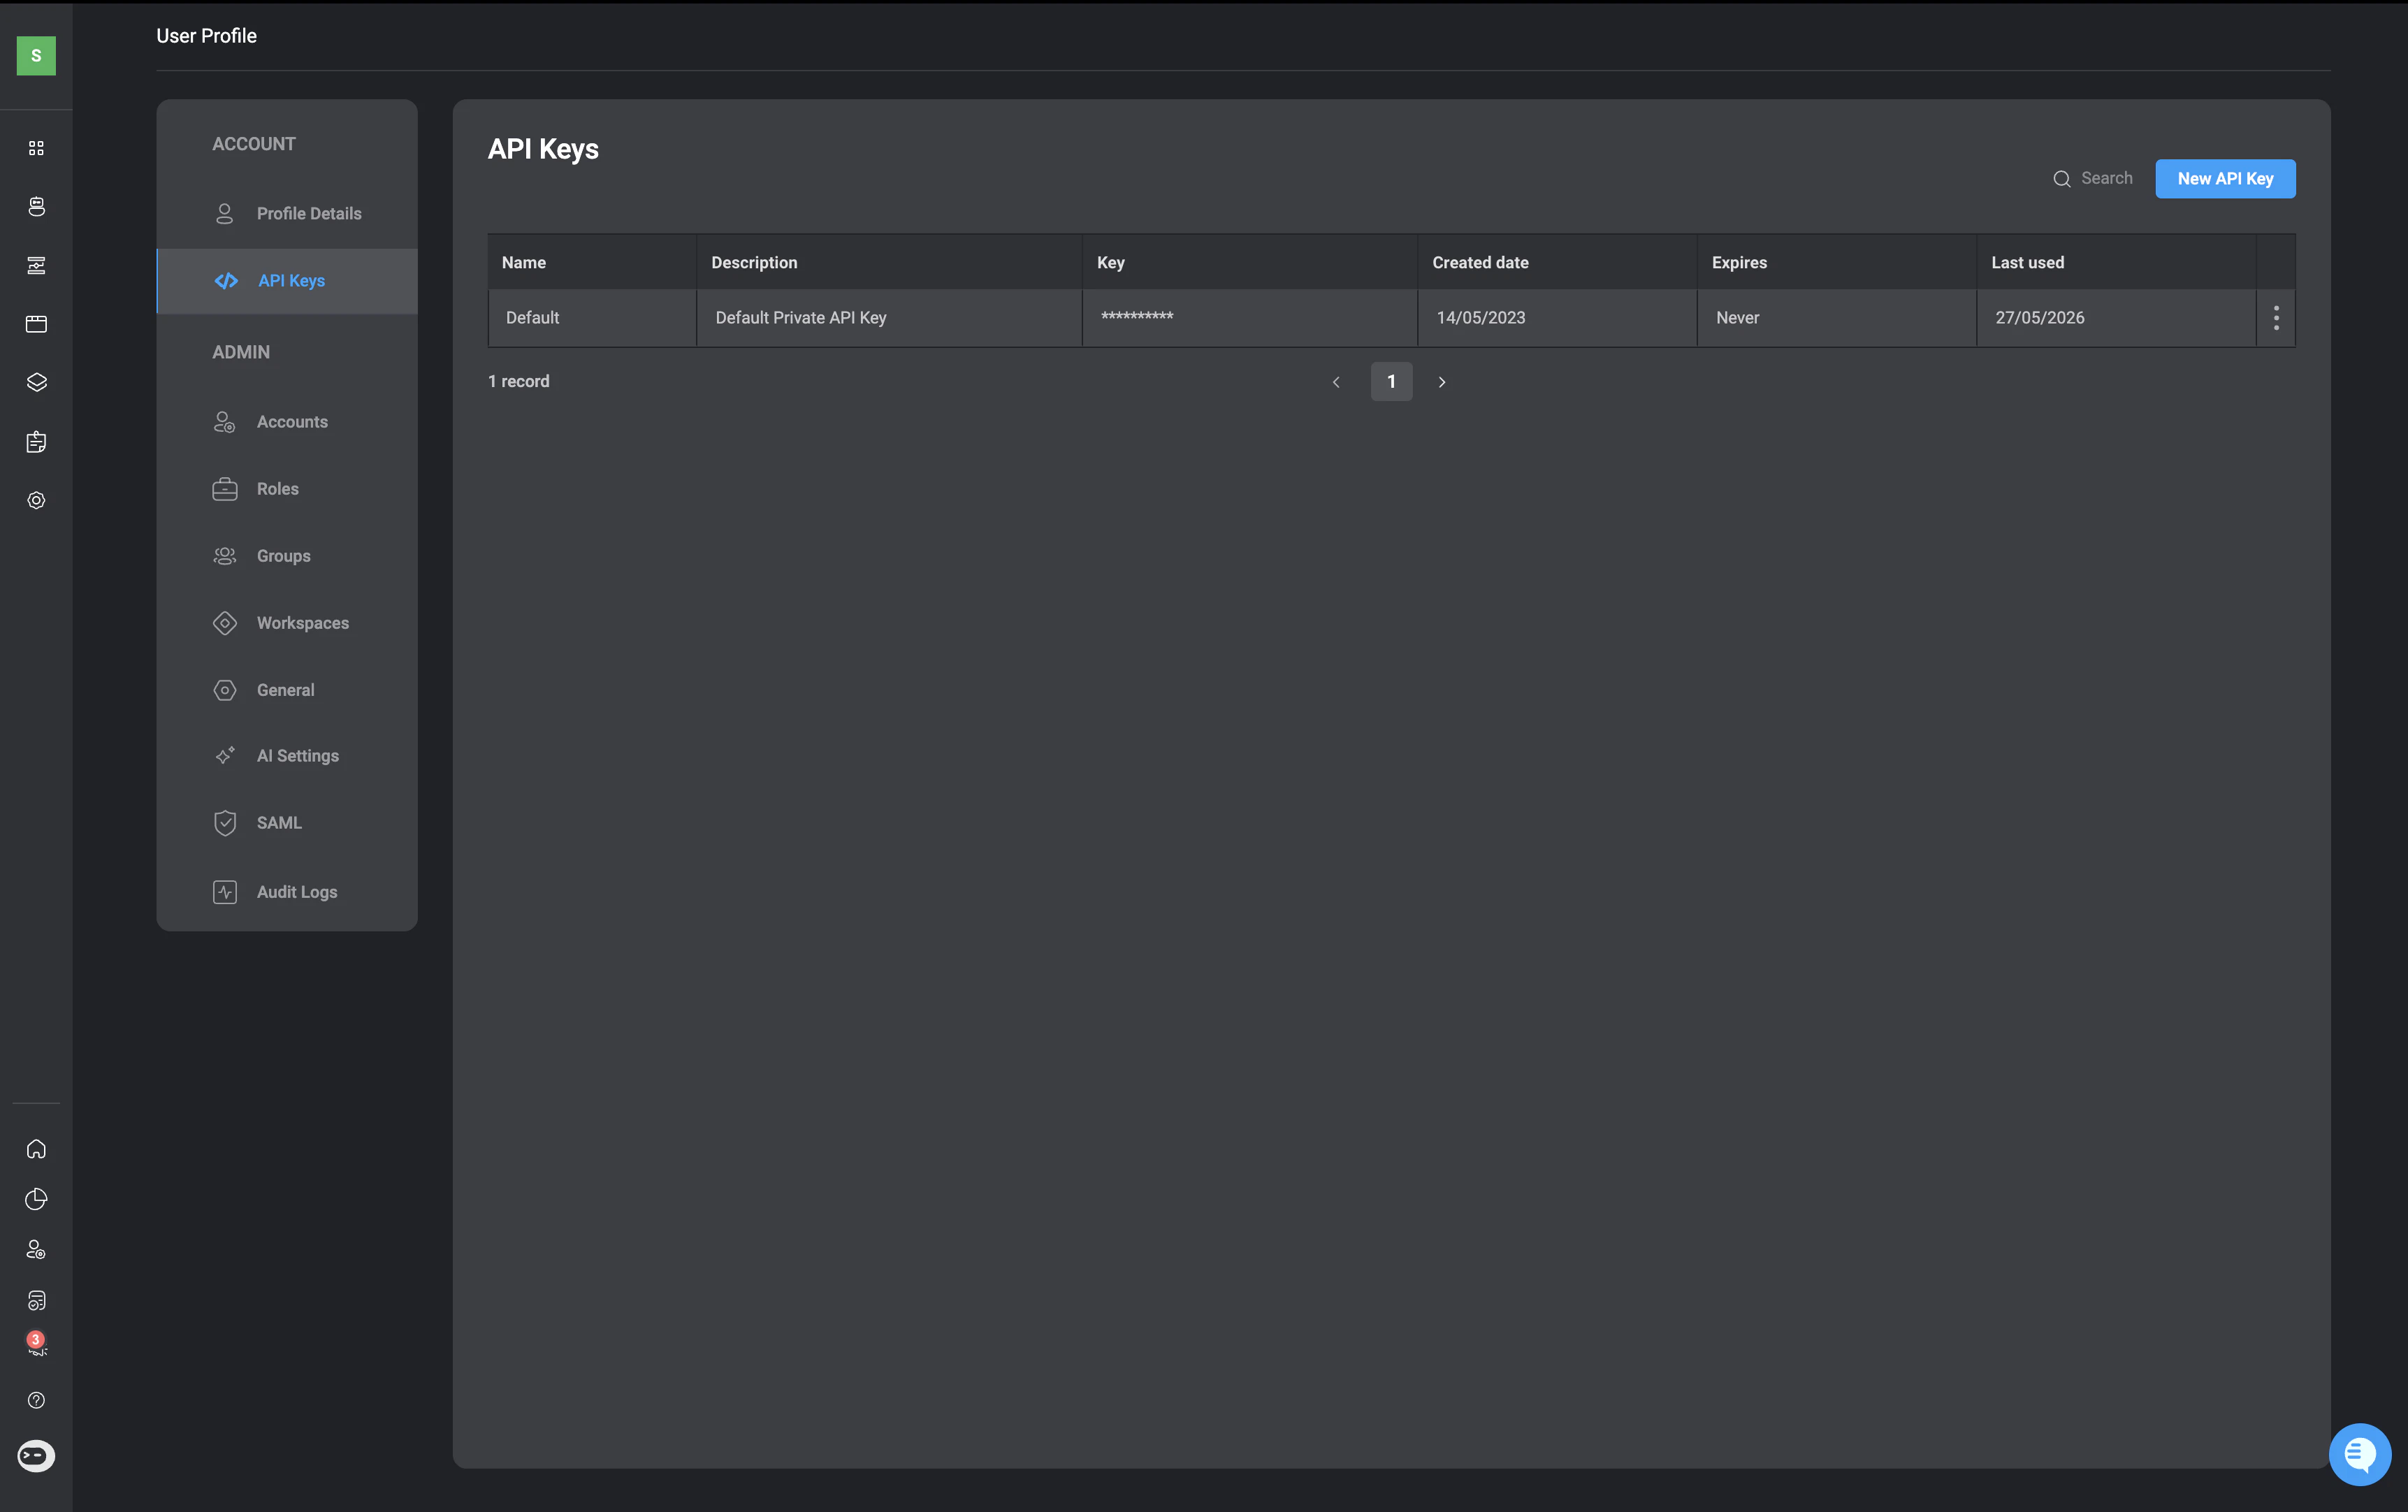 **NOTE**: There always has to be one API key available. The maximum number of API keys at any given time is `5`.
## Create API Key
Select the **New API Key** button in the top-right corner
Give your API key a name, description (optional) and choose when the API Key expires (after 30 days, 90 days or never ). Then click the create button in the bottom-right corner.
**NOTE**: There always has to be one API key available. The maximum number of API keys at any given time is `5`.
## Create API Key
Select the **New API Key** button in the top-right corner
Give your API key a name, description (optional) and choose when the API Key expires (after 30 days, 90 days or never ). Then click the create button in the bottom-right corner.
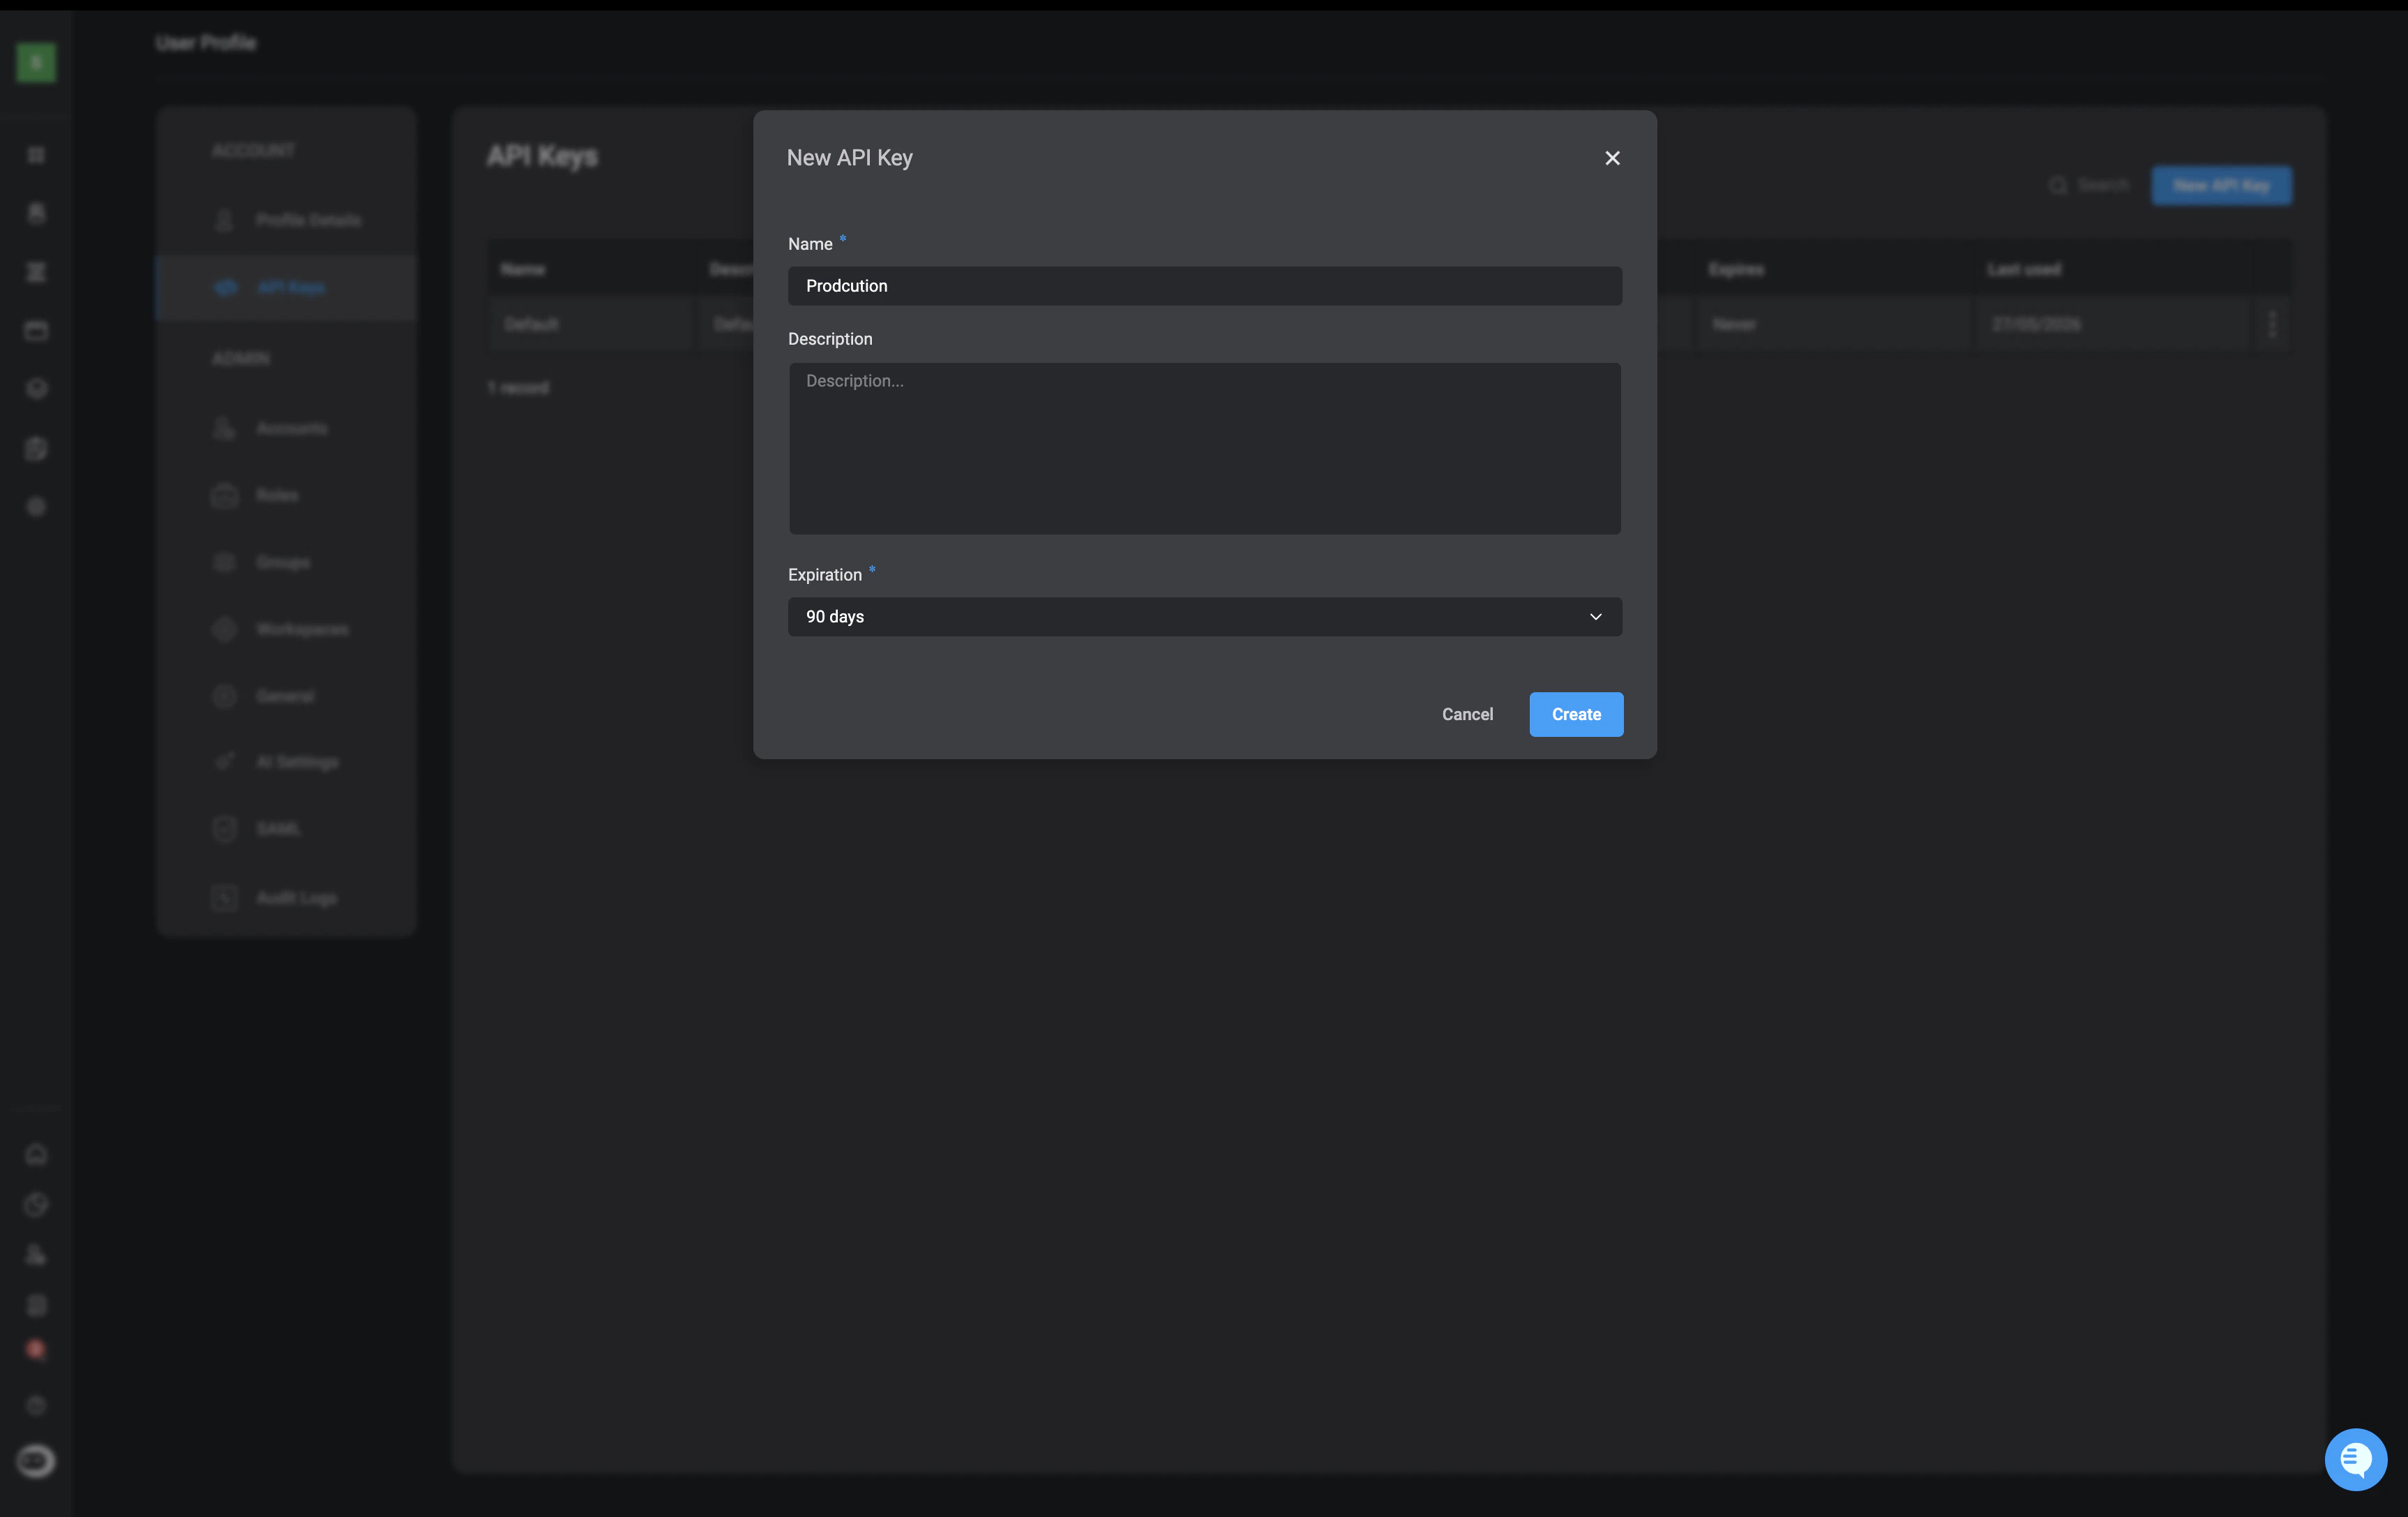 It will be added to the table.
| Parameter | Description |
| ----------- | -------------------------------------------------------------------------------------------------------- |
| Name | Name given to the API Key |
| Description | Description given to the API Key |
| Key | The API key itself |
| Created At | The time you created the API key |
| Expires | It will display: the day of expiration, never- if no expiry is set or expired- if expiration date passed |
| Last used | The last time you used the API key |
## Generate a New API Key
**Note**: This setting can only be used with the default API key which is now a legacy feature so will only appear in certain Tenants
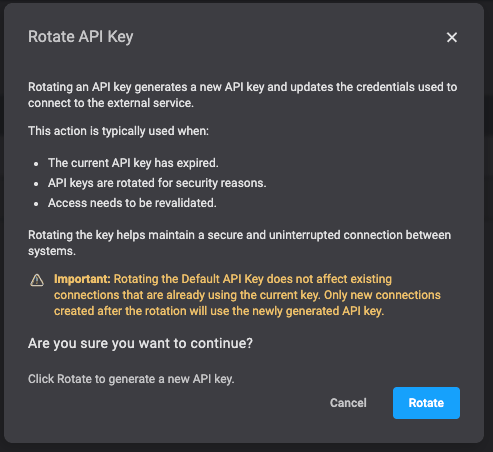
To generate a new API key, click the icon on the right-hand side of the default API key row, then select **Rotate**.
A popup will appear asking you to confirm if you are sure you would like to rotate the API key. Select the confirm button
It will be added to the table.
| Parameter | Description |
| ----------- | -------------------------------------------------------------------------------------------------------- |
| Name | Name given to the API Key |
| Description | Description given to the API Key |
| Key | The API key itself |
| Created At | The time you created the API key |
| Expires | It will display: the day of expiration, never- if no expiry is set or expired- if expiration date passed |
| Last used | The last time you used the API key |
## Generate a New API Key
**Note**: This setting can only be used with the default API key which is now a legacy feature so will only appear in certain Tenants
To generate a new API key, click the icon on the right-hand side of the default API key row, then select **Rotate**.
A popup will appear asking you to confirm if you are sure you would like to rotate the API key. Select the confirm button
 ***
## Edit API Key
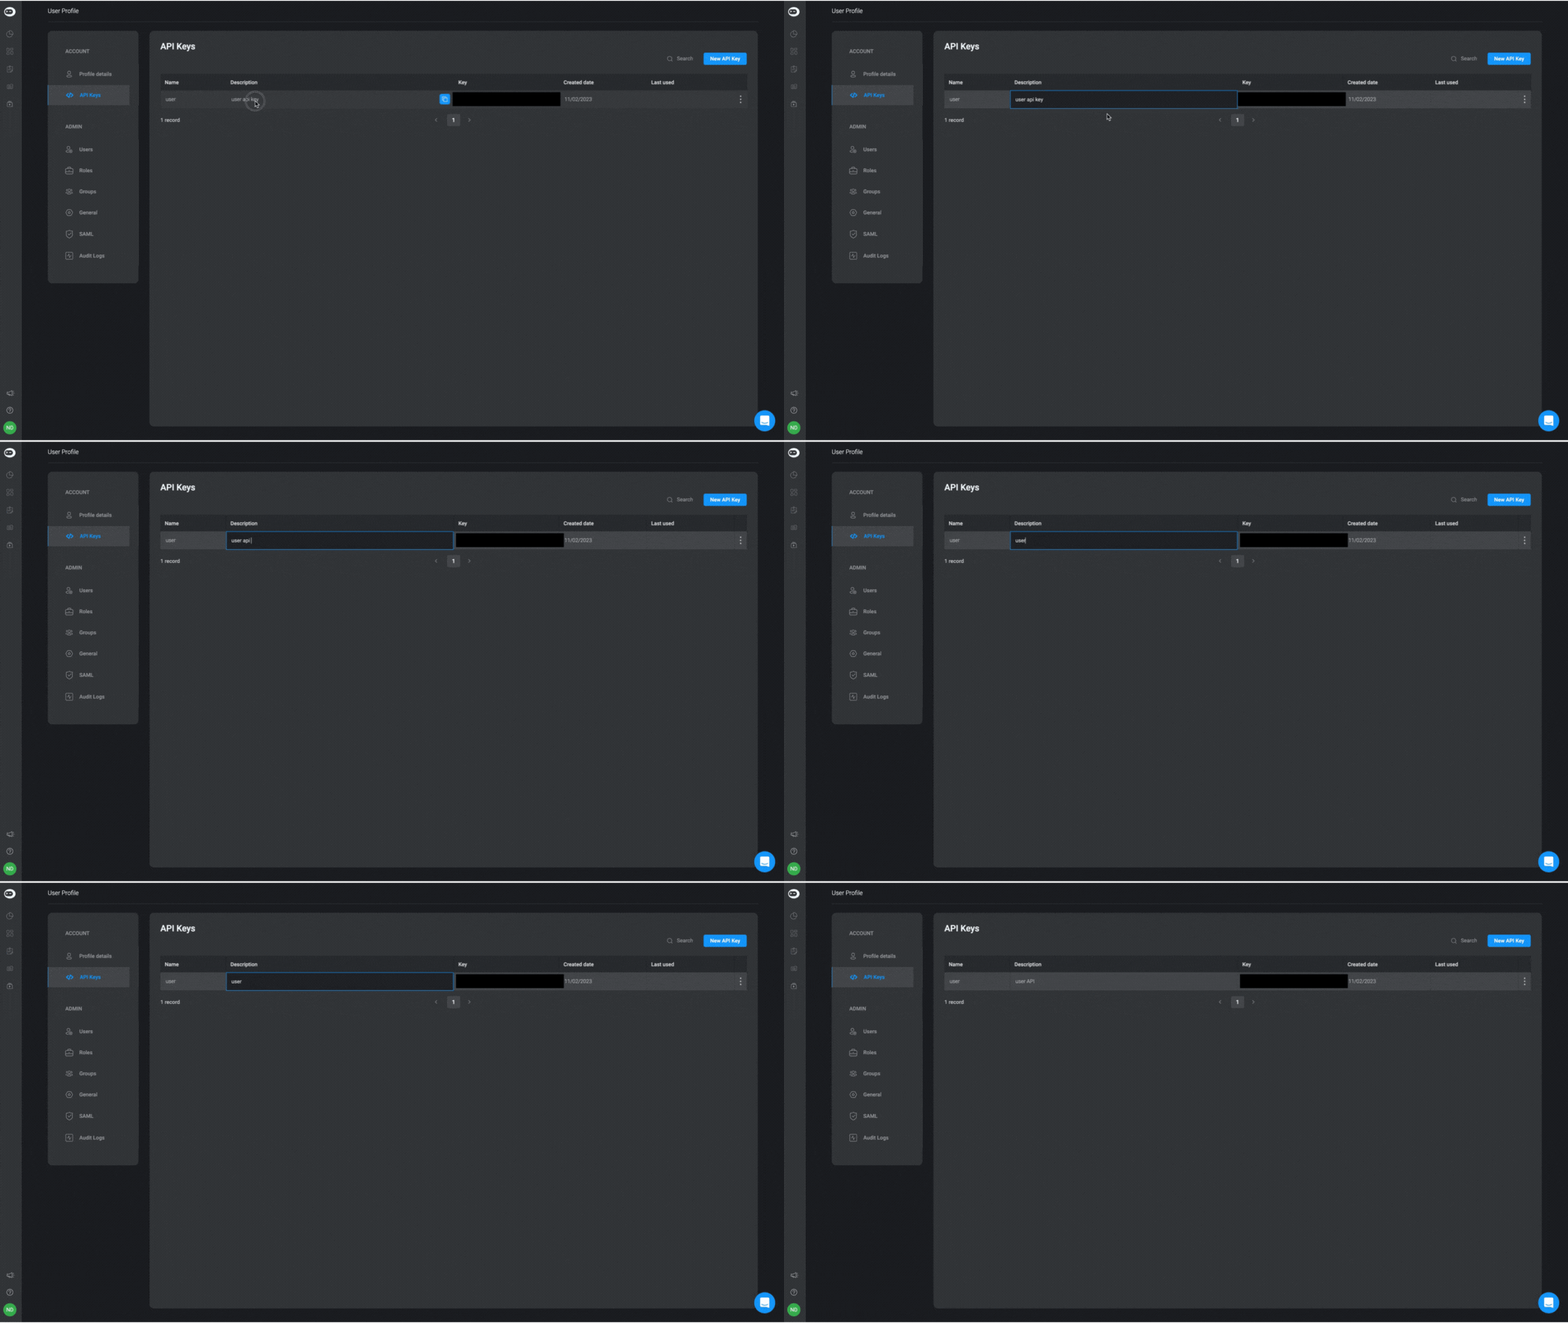
If you want to make any changes to the API information, double click on the cell and make the desired changes. You can change the API key name or description.
***
## Edit API Key
If you want to make any changes to the API information, double click on the cell and make the desired changes. You can change the API key name or description.
 ***
## Delete API Key
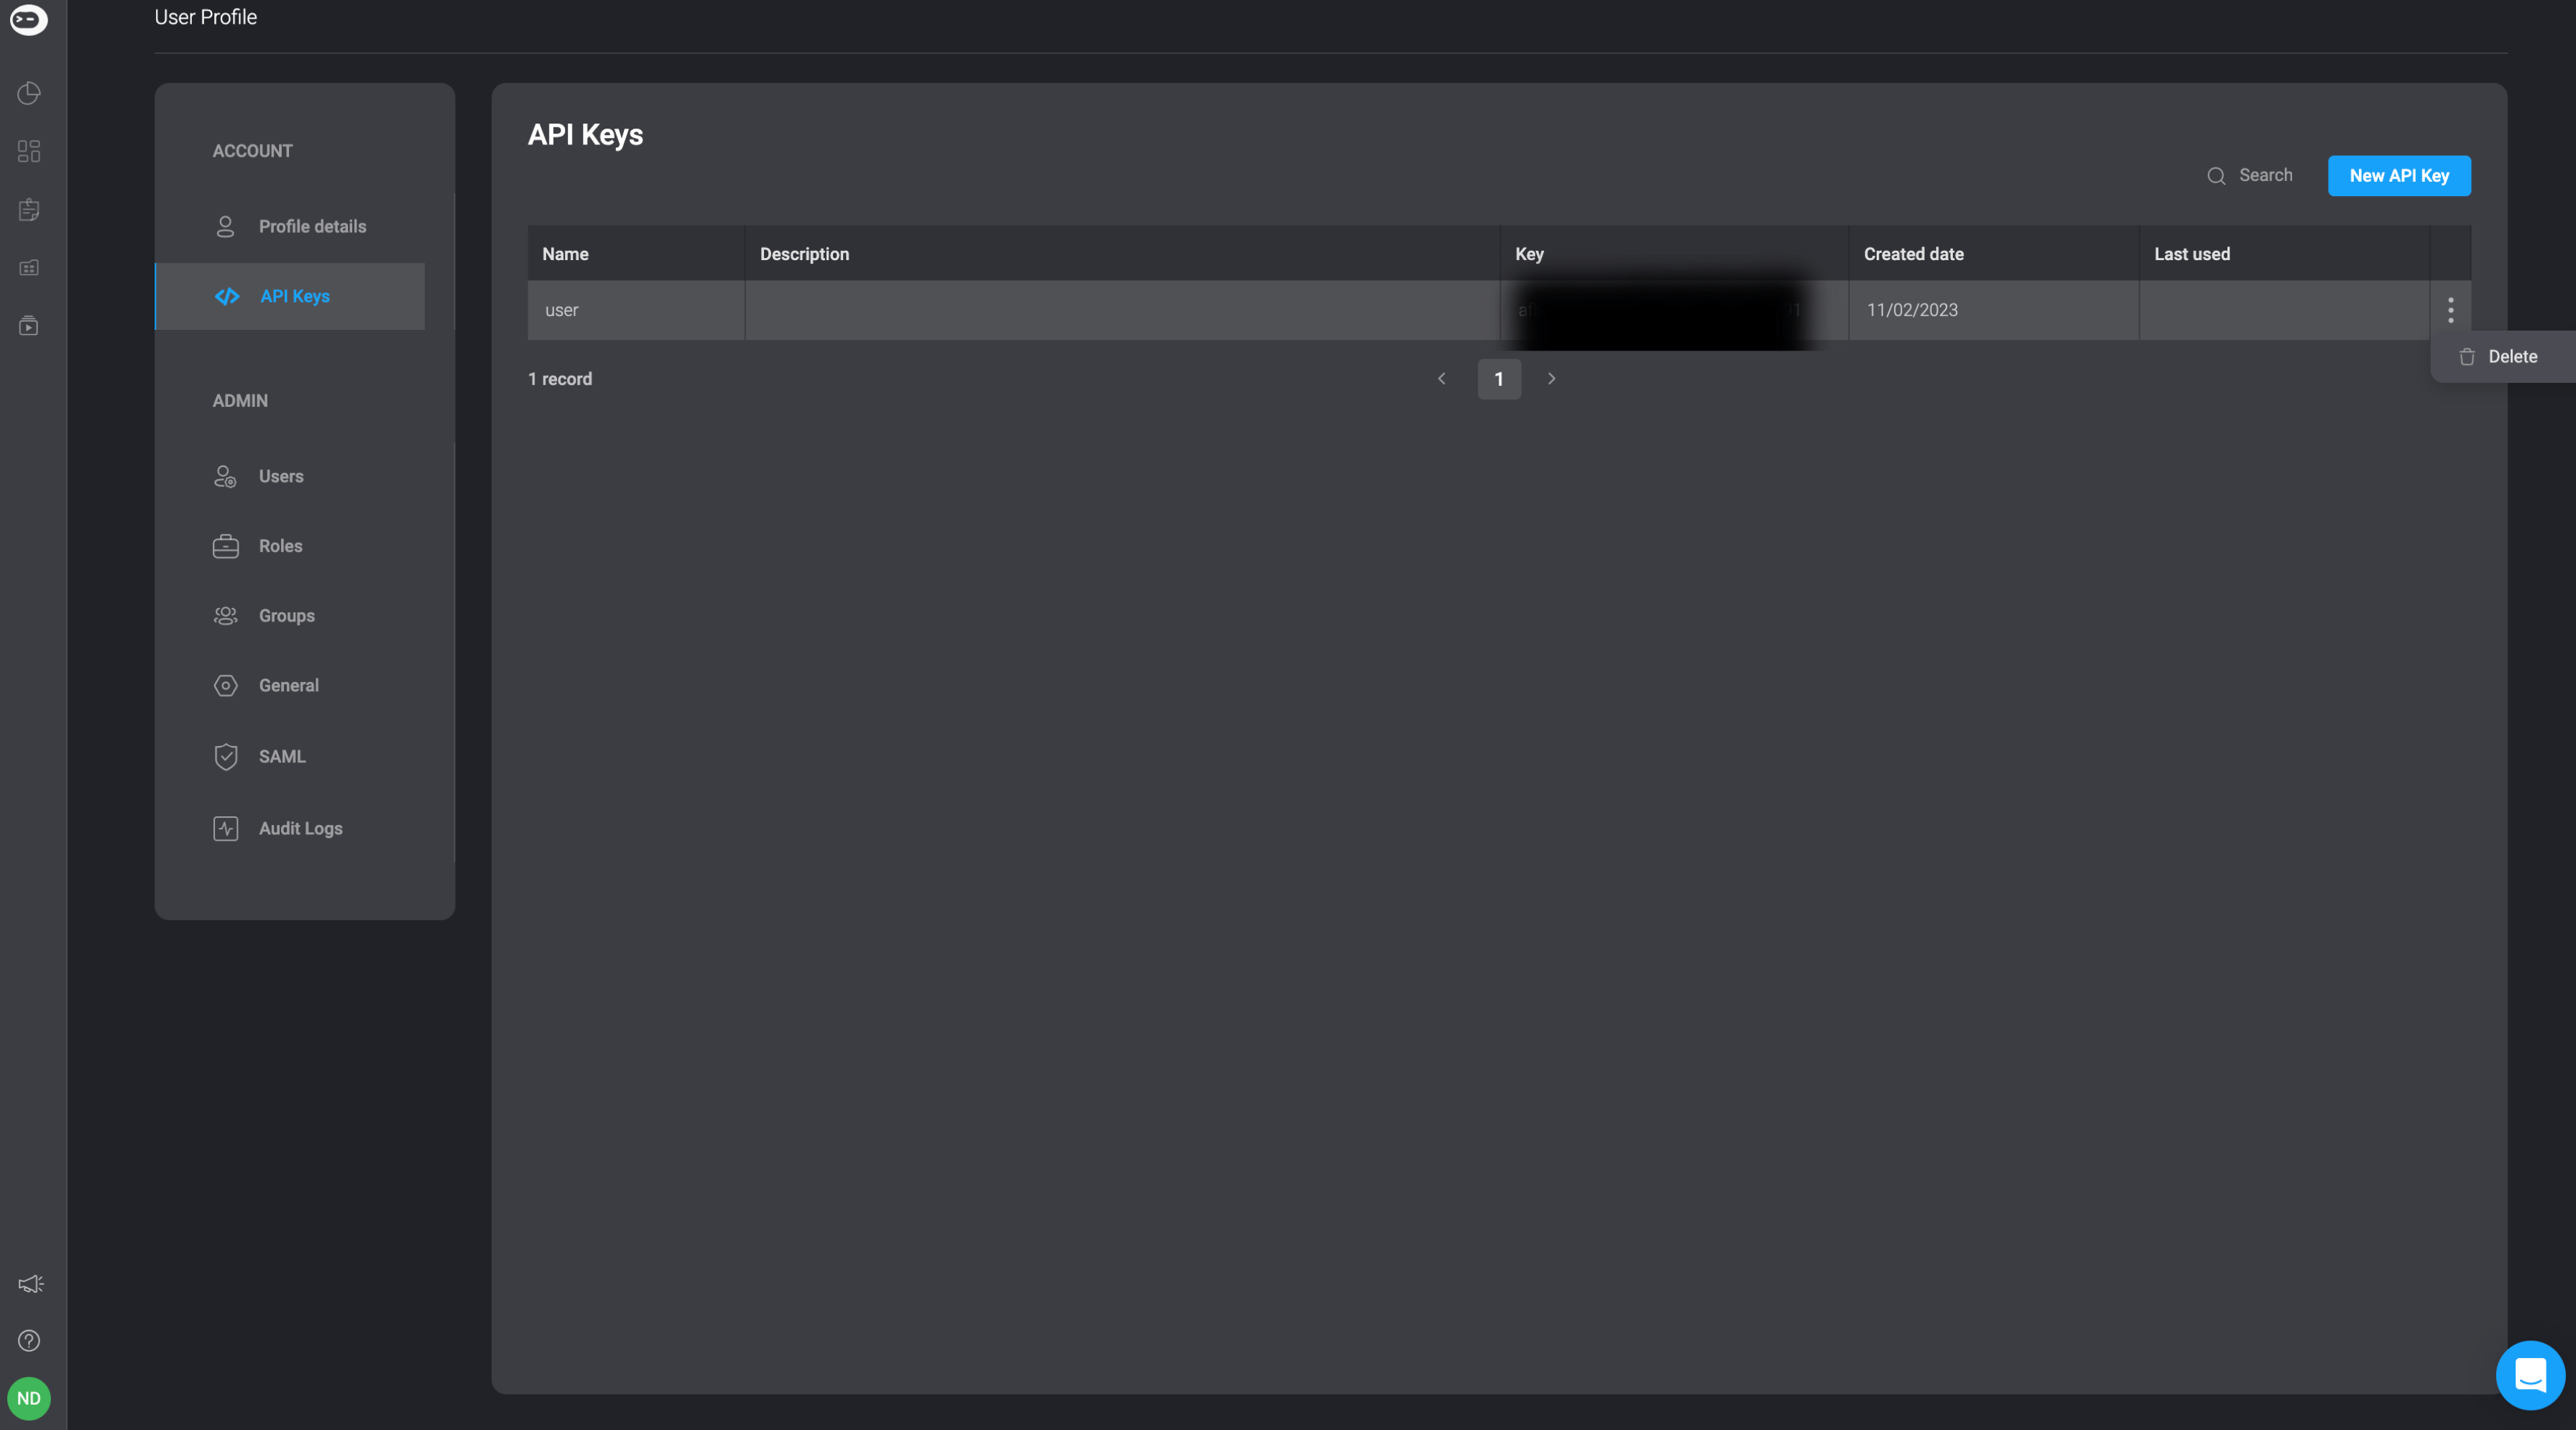
If you want to delete an API Key, click on the icon on the right-hand side of the row and select the **delete** option.
***
## Delete API Key
If you want to delete an API Key, click on the icon on the right-hand side of the row and select the **delete** option.
 ***
## Using your Personal API Key in Workflows
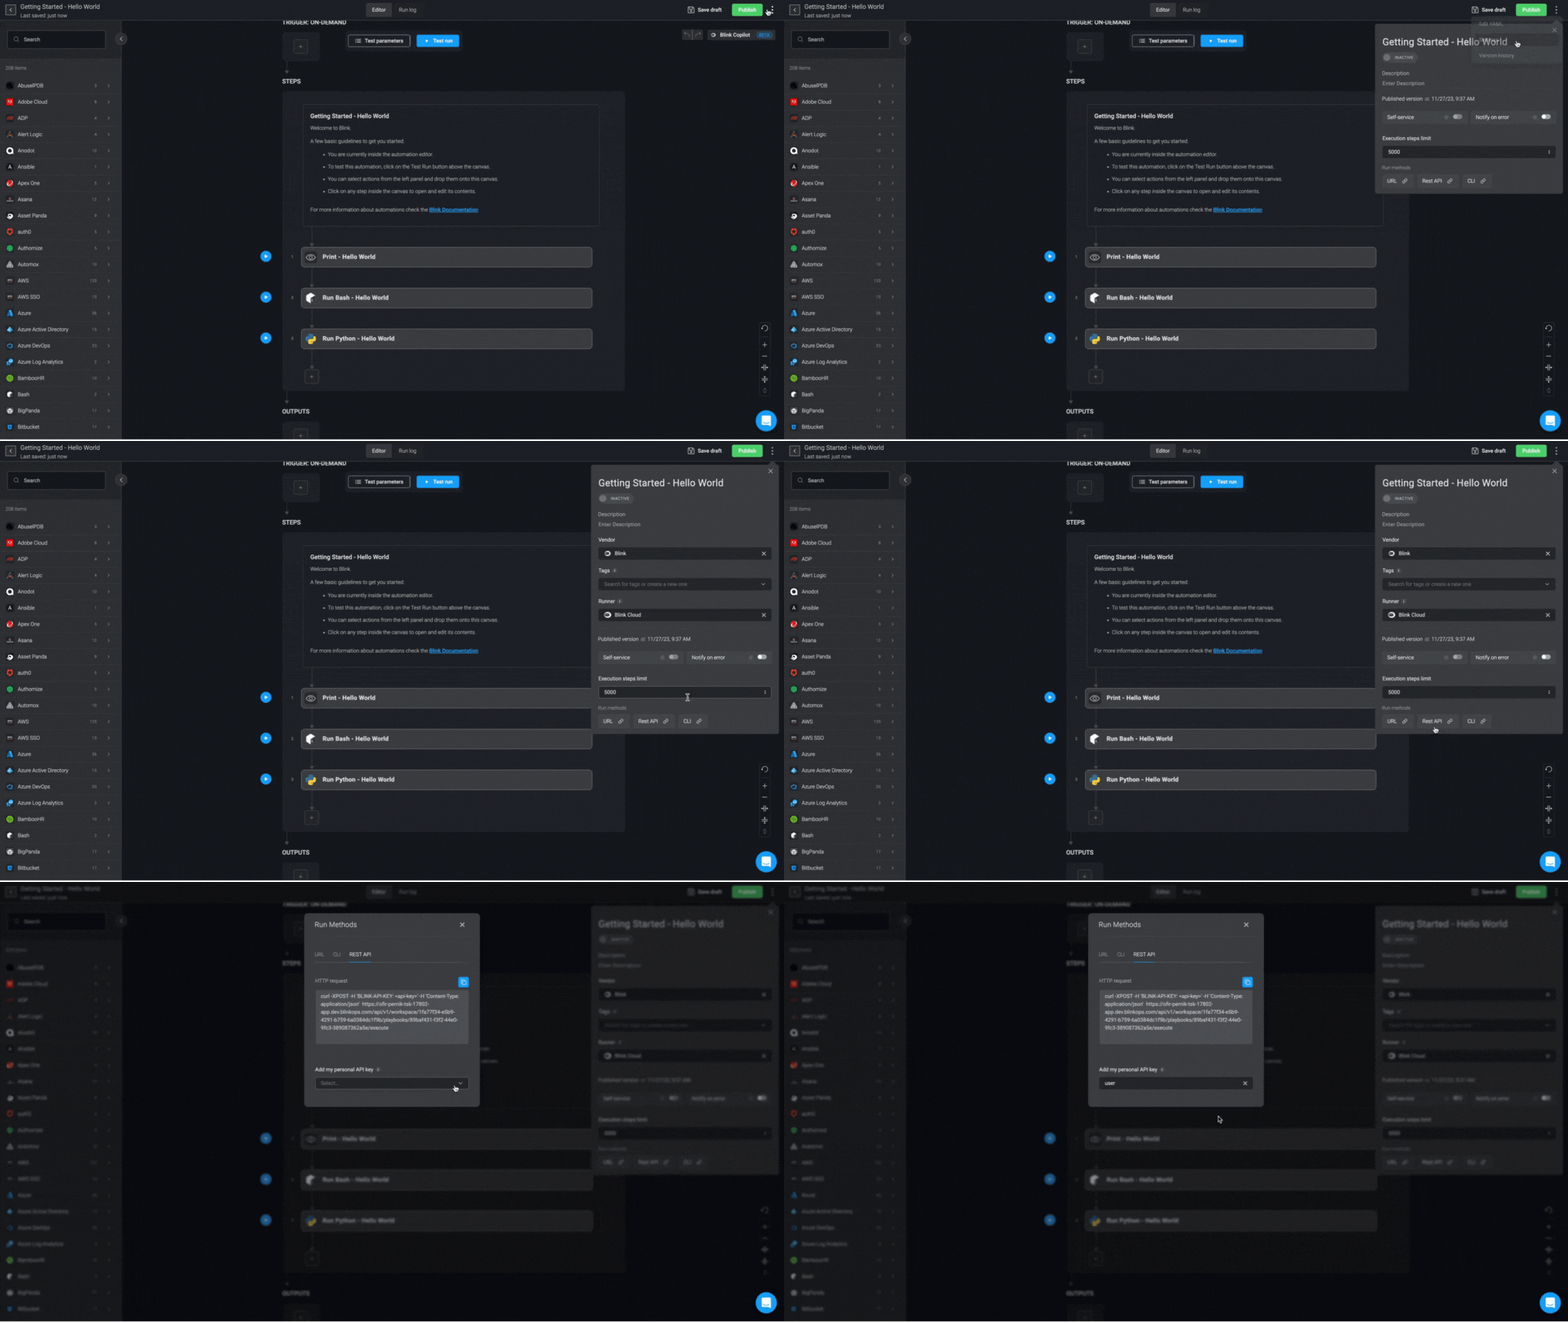
Click anywhere on the workflow within the Workflow pack.
You will be redirected to the Workflow Editor.
Click the icon in the top right-hand side corner.
Choose the Settings option to access the Workflow settings.
Go to the **Run Methods** section and select the **REST API** or **CLI** method.
Under the command text field, select which **personal API key** from the dynamic dropdown menu.
Upon selection, your **personal API key** will be added to the command, allowing you to proceed using the chosen run method for your chosen Workflow.
***
## Using your Personal API Key in Workflows
Click anywhere on the workflow within the Workflow pack.
You will be redirected to the Workflow Editor.
Click the icon in the top right-hand side corner.
Choose the Settings option to access the Workflow settings.
Go to the **Run Methods** section and select the **REST API** or **CLI** method.
Under the command text field, select which **personal API key** from the dynamic dropdown menu.
Upon selection, your **personal API key** will be added to the command, allowing you to proceed using the chosen run method for your chosen Workflow.